Guitar Templates
There are as many ways of making guitar templates as there are builders out there. The system I use is developed for maximum flexibility. As an example, I keep the body contours separate from the guitar body cavities. This way I can mix and match body shapes with pickup options very easily.
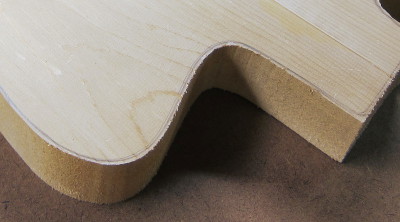 Northern White Cedar guitar body blank with rough edge cut with a jigsaw Northern White Cedar guitar body blank with rough edge cut with a jigsaw |
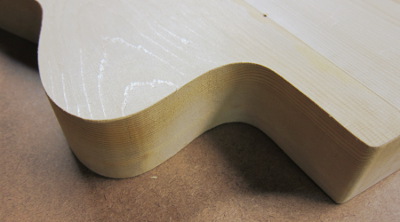 The same guitar body edge trimmed with a router and a template The same guitar body edge trimmed with a router and a template |
The whole point of using a template is to transfer the shape from a piece of paper to a piece of wood accurately.
The templates described here are best used with a router and a pattern bit. But before taking the router to the wood, the shape needs to be roughed in using a jigsaw or bandsaw.
Any extra work put into making the edge of the template smooth will pay off in less sanding of the finished piece later.
I have divided up the guitar templates I use into three types as outlined below.
Contour Templates
|
The first type is simply the outline of the body, pick-guard or peghead laid out separately on a sheet of paper. All my templates are generated from CAD and saved as pdf files, with the intention to be printed out on an accurate printer. For bodies that means large-format printing. Smaller templates, like headstocks and pickguards can be printed out on an office laser printer or inkjet. |
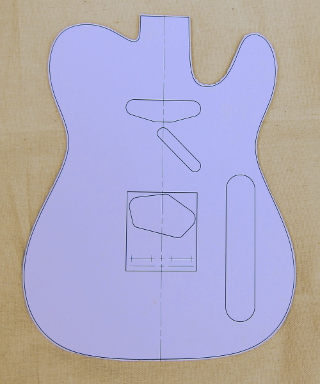 A Mini Telecaster Template A Mini Telecaster Template |
Guitar Cavity Router Template
|
The second type of templates are physically separate from the outline templates and are of the different cavities in a guitar body, for example controls or pickup cavity. These templates can be ugly as sin, but gets the job done. A note of caution when using someone else's templates: Not all hardware are exactly the same. It is therefore a good practice to acquire the hardware you intend to use and verify that it matches the template before routing the guitar body. |
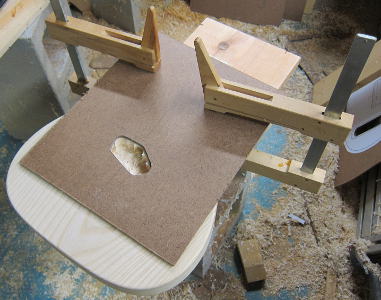 Bridge Pickup Template on a Telecaster Bridge Pickup Template on a Telecaster |
Neck Pocket Templates
|
With so many after-market bolt-on necks out there, one would hope they are all interchangeable. Unfortunately, at my budget level, that is rarely the case. For that reason I have developed a method of making neck pocket templates that I think is pretty unique. The result is a perfect fit every time. I essentially make a molded router template for each neck I use. It's actually really fast, cheap and easy. There is a separate page describing how to make a neck pocket template if you follow the link. |
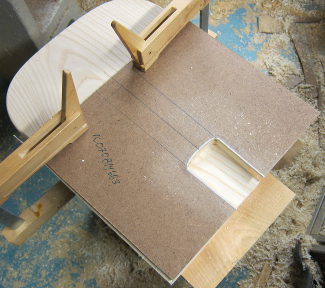 Neck pocket template in use Neck pocket template in use |
Fabricating a Template
First I have the pdf files printed out. As stated earlier, bodies have to be on large format as most are bigger than the largest size office paper. I usually go to Kinko's or the UPS store locally. Office supply stores, such as Office Depot and Staples often have the capability as well.
Each print is cut out from the paper sheet and glued onto 3/16" hardboard. I'm not particularly neat when I cut them out. I try and leave 1/4" of paper all around the perimeter and don't follow exactly. For instance, the cutaways are typically skipped over.
The glue I use is 3M "Super 77" spray adhesive. It works great, but is stinky and flammable. I use it outside whenever weather permits.
The hardboard is then trimmed back closely to the contour with a jigsaw, smoothed with a 4-in-1 rasp, and finished with sandpaper.
With a router and a pattern bit I will be able to copy this shape very closely to the body blank.
Templates in Use
The following pages show different guitar templates in use:
- Guitar Body
- Headstock
- Pickguard
- Neck Pocket
- Pickup Cavity
Downloadable Guitar Templates
You can purchase the plans/templates for the mini Telecaster and Mini Jagmaster on the guitar plans page.
Recent Articles
-
Speaker Plans
Feb 04, 18 05:23 PM
Speaker plans for download - free pdfs for DIY builders and tire kickers
